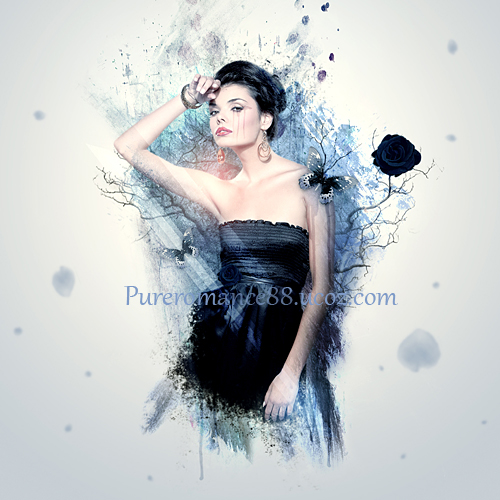
Time to update my blog
 .
.In this tutorial i will show you how to create a nature themed, abstract photo manipulation. You'll learn how to use different textures, brushes as well as adjust colors to make an interesting abstract piece .
Resources:
Butterfly: my own
1. Create a new document and fill it with white. You can choose the size you like but i use 1000x1000 px.
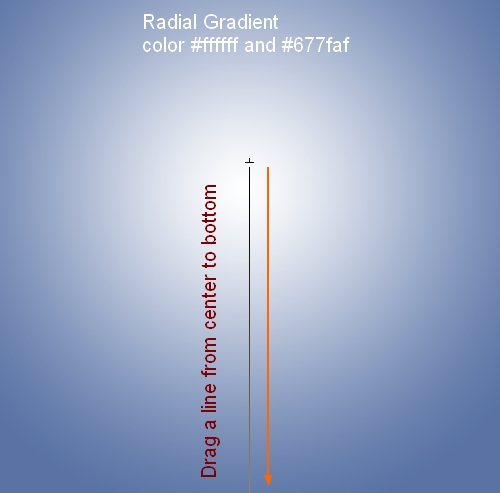
Create a new layer and click G to active Gradient Tool. and choose Radial Gradient with white and #677faf.
Drag a line from center to bottom:
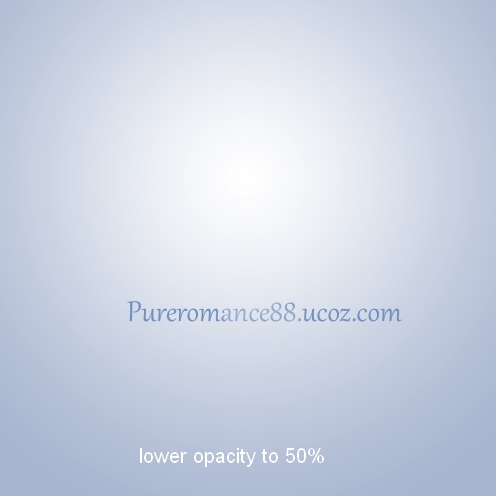
Lower opacity of this layer to 50%:
2. Extract model from background and place her into our document.
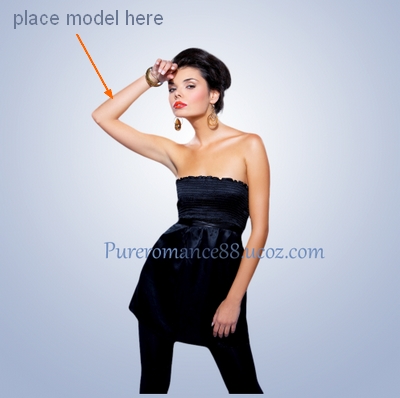
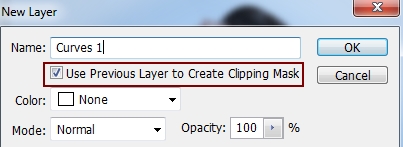
To change color of model to be fit background, i use some adjustment layers with Clipping Mask for her.
First, go to Layer-New adjustment layer-Curves:
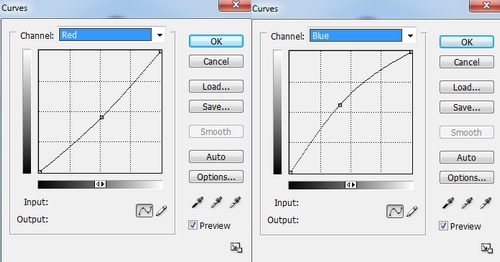
Then Layer-New adjustment layer-Hue/Saturation:
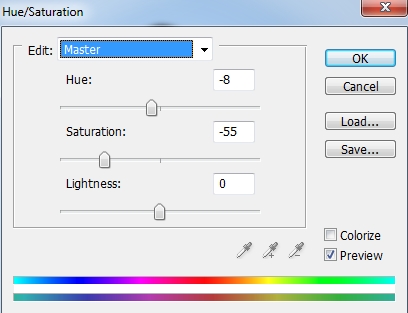
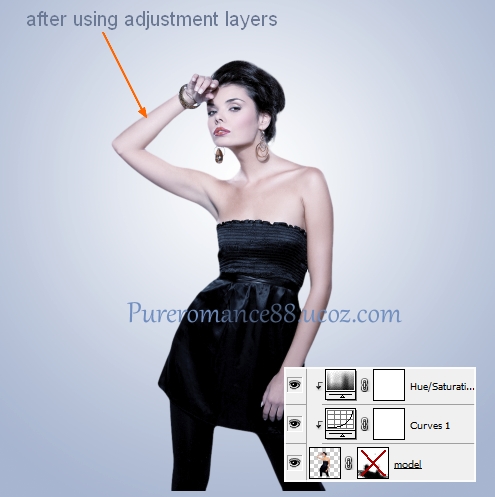
3. Add layer mask for model layer. Take random grunge brushes and paint on model head, model legs and the right arm to make shattered effect. Try different brushes to get rid of fake look:
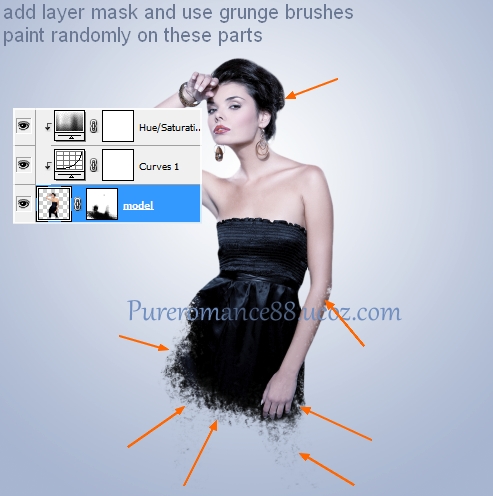
To add more particle effect , make a new layer on the top. Set foreground color to black and use grunge brushes to paint around model head and under model dress. You can use Eraser Tool to add layer mask to remove any unwanted parts:

4. Open watercolor texture 1. Drag it into our ducument, resize, transform ( Cmd/Ctrl+T) and place it under model layer.
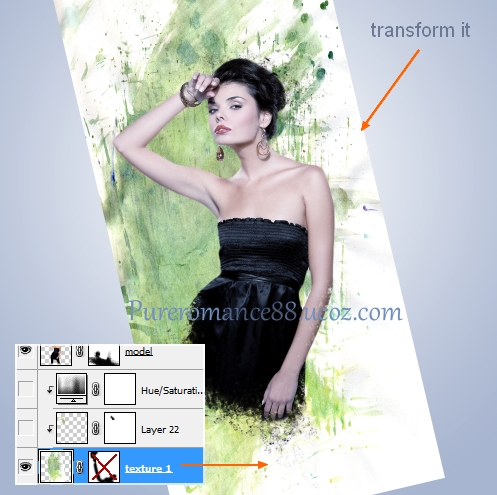
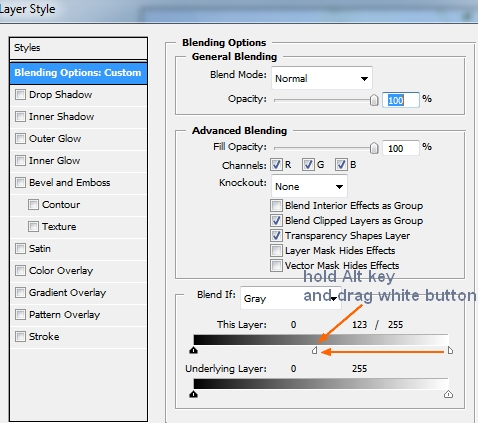
To remove most of white parts of background, i use Blend If tool. Right click this layer, choose Blending options. Hold the Alt key and drag white button of This Layer:

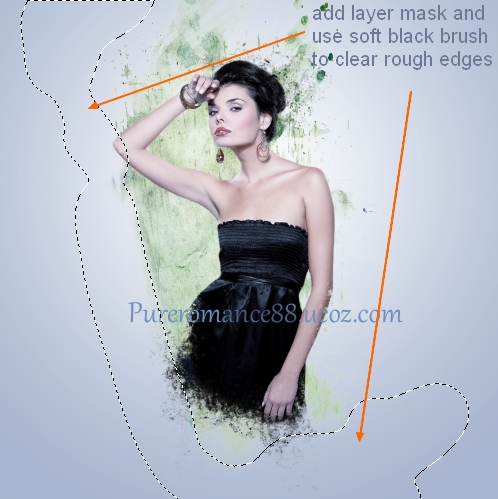
Add layer mask and use soft black brush to clear remained white part:
Create a new layer above texture 1 with Clipping Mask. Come back to texture 1 layer, use Lasso Tool ( L) to make a selection for a part as shown below. Press Cmd/Ctrl+C to copy it. On new layer above, hit Cmd/Ctrl+V to paste copied part into it:

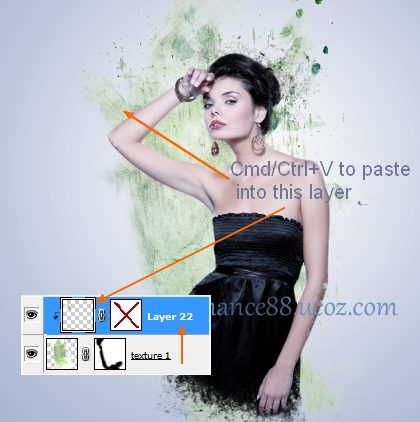
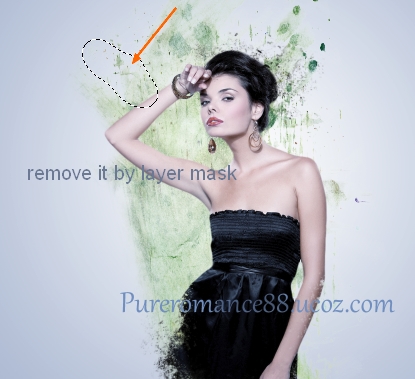
Add layer mask to remove unwanted part:
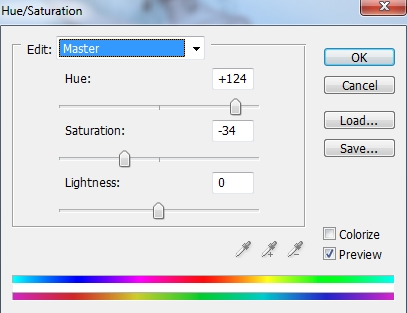
5. To change color of this texture, i use a Hue/Saturation layer with Clipping Mask:
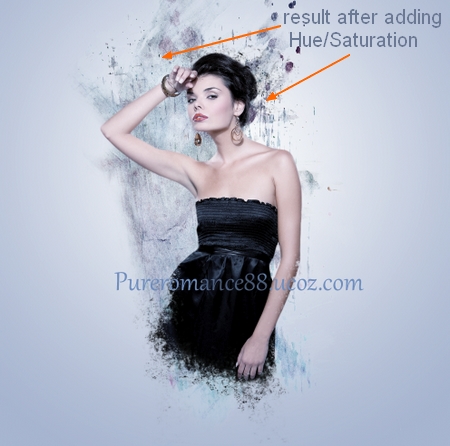
6. Create two new layers under texture 1 layer. Set foreground color to black. Use two random tree brushes and paint behind model back. You can use transform tool and add layer mask to remove unecessary parts:
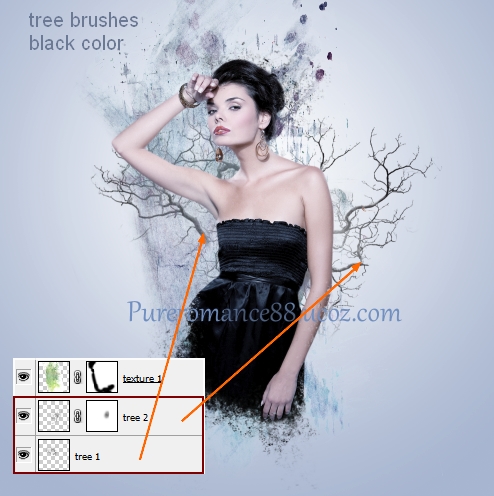
7. Open watercolor texture 2. Drag it into our canvas and place it on the top. Use Blend If tool to remove white parts as we did in step 4. Change the mode of this texture to Hard Light 100%. Then add layer mask and use brush to make most of model part visible again.
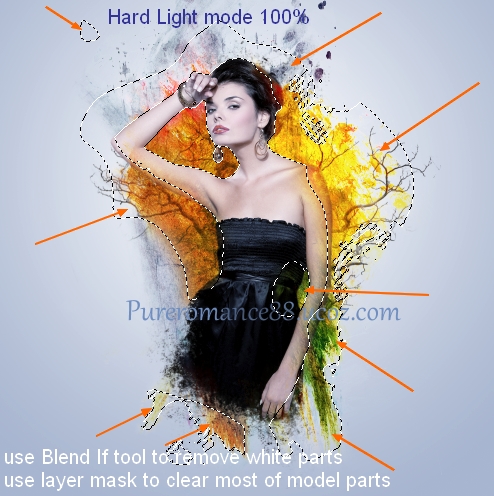
Add a Hue/Saturation layer with Clipping Mask for this texture:
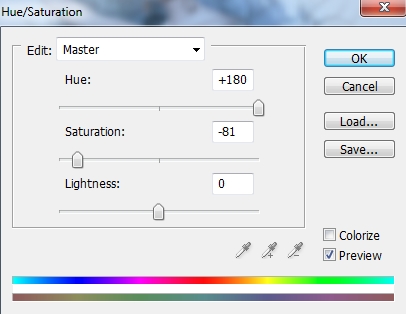
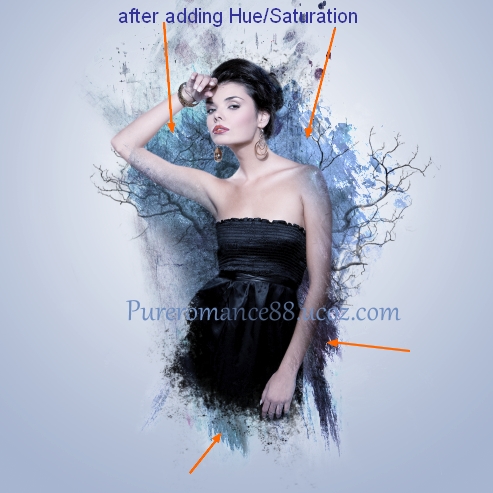
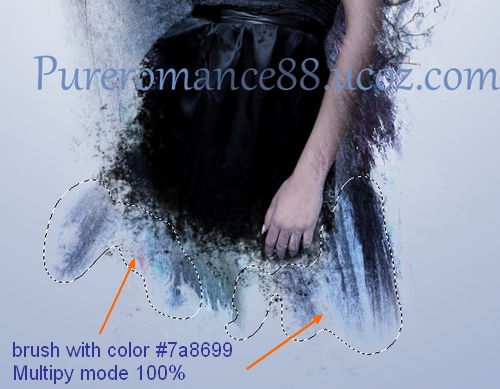
Create a new layer ( Clipping Mask), take soft brush with color #7a8699. Paint on any white parts you've noticed . Change the mode to Multipy 100%:
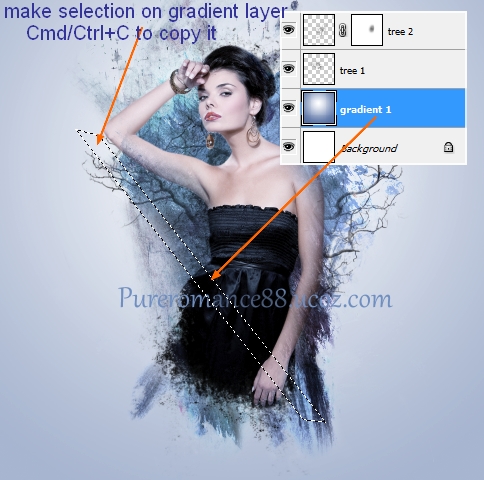
8. Create a new layer on the top. On gradient layer ( which is created in step 1), use Polygonal Lasso Tool to make a selection and hit Cmd/Ctrl+C to copy this part:
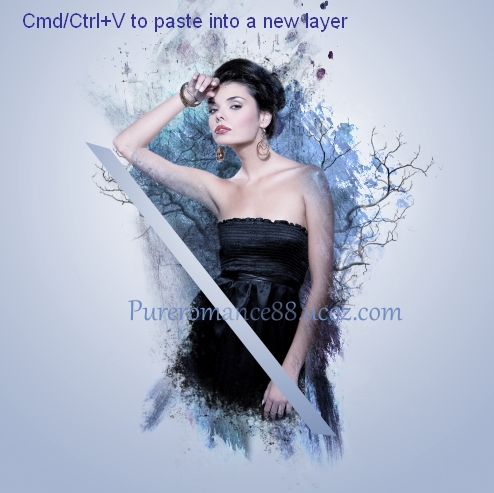
On new layer which is just created, hit Cmd/Ctrl+V to paste into it:
Change the mode to Soft light 100%.
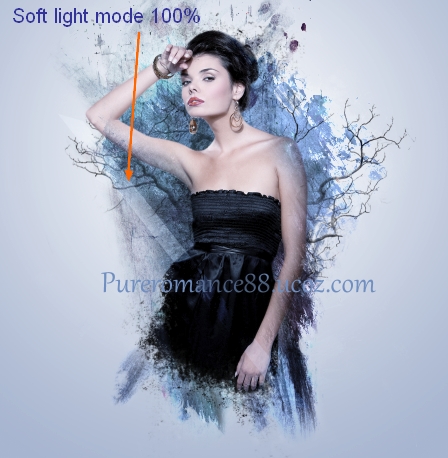
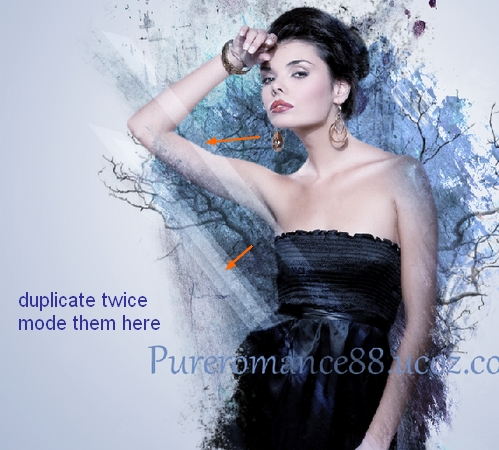
Duplicate this layer twice and move them into different position. Resize one of them to be smaller:
Add layer mask to clear or blur the top and some parts of these lines:

9. Make a new layer on the top. Use rose petal brushes , number 111 ( or any you like) with color #677faf . Press F5 to make settings for these brushes:
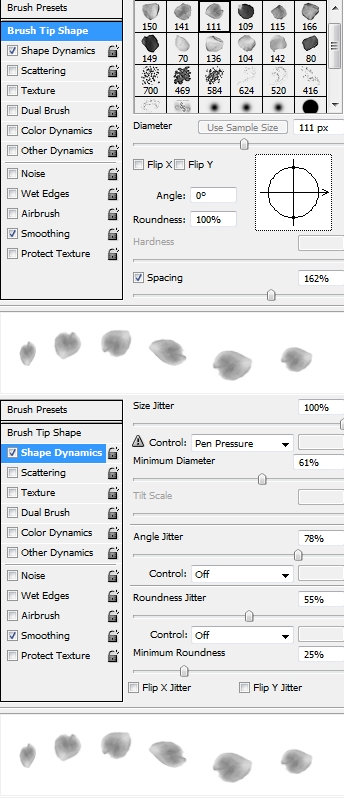
Paint on background then lower brush size to 30-40 px to continue painting:
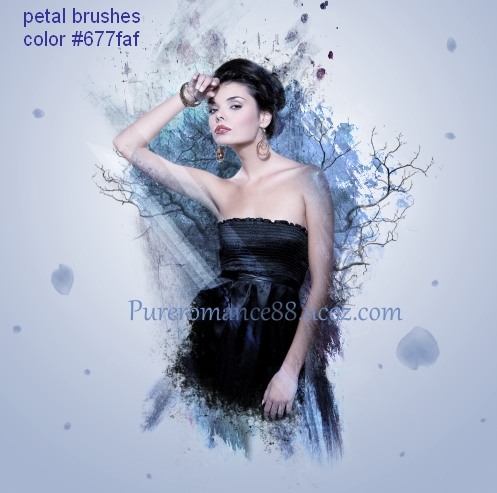
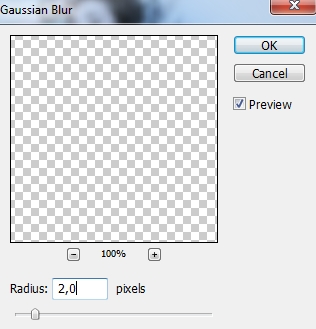
To add some depth for picture i want to blur these petals. Go to Filter-Blur-Gassian Blur:
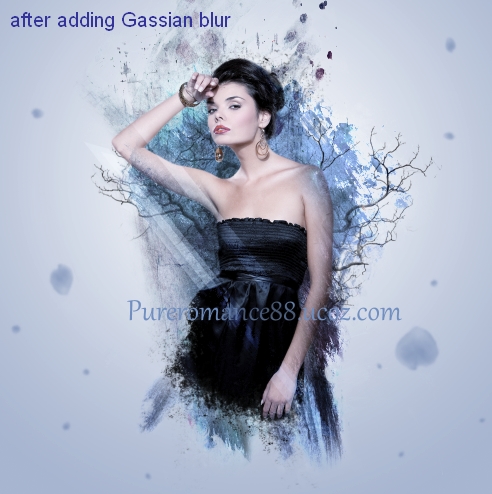
10. Open rose stock pack. Choose the one you like and use Lasso Tool to make selection around it, resize and move into our document:
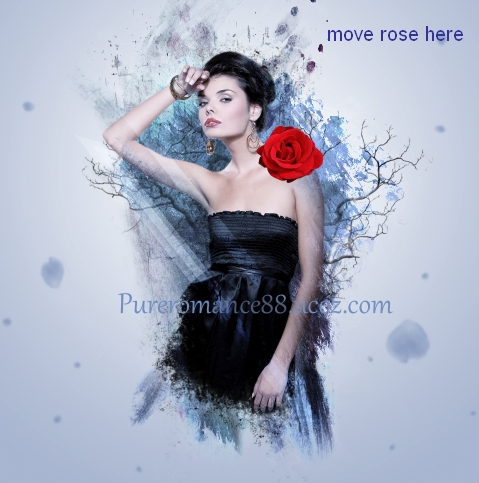
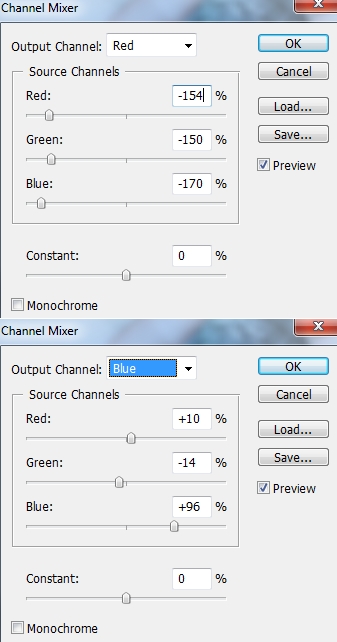
Add two adjustment layers ( Clipping Mask) to change color of the rose:
Channel Mixer:
Hue/Saturation:

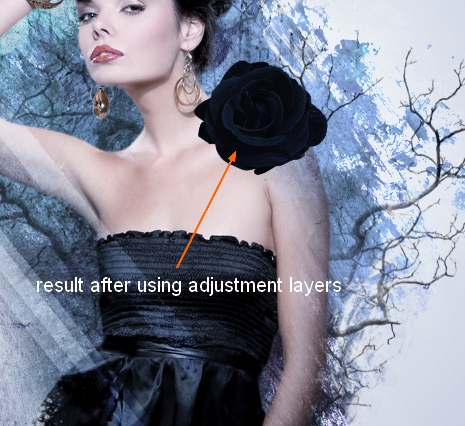
Choose 3 these layers ( rose, two adjustment layers), hit Cmd/Ctrl+G to make group for them. Right click this group, choose Duplicate Group. Then on duplicated group, choose Merge Group. Now we can use this merged group as a normal layer. Duplicate this layer and scale it down. Position them as the image below shows:
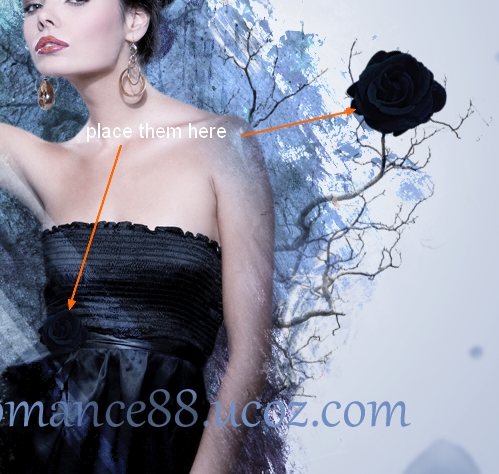
11. Open butterfly stock. You can easily find a free stock butterfly on the web. Extract it and move into our canvas, duplicate and resize them. Transform them into different movement:
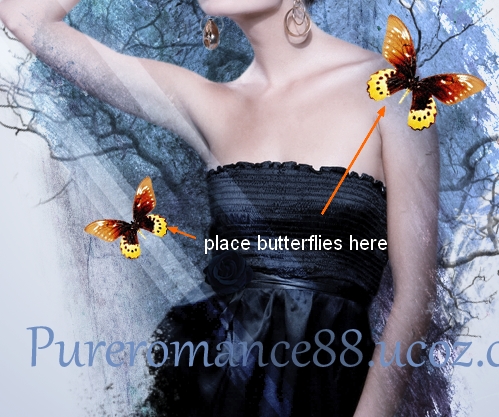
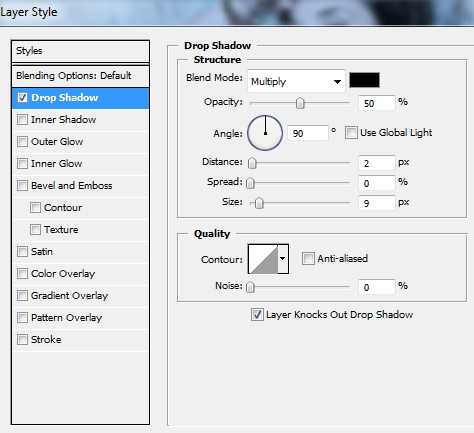
Right click each butterfly layer, choose Blending options:
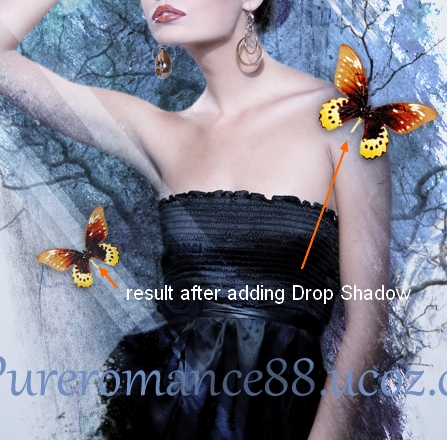
With each butterfly layer, add a Hue/Saturation layer with Clipping Mask:

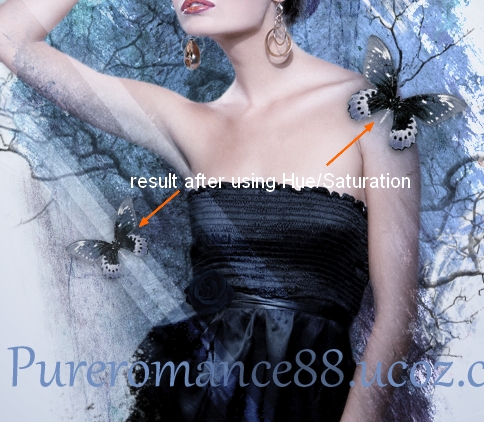
12. Create 6 new layers on the top and set foreground color to black. On each layer, use splatter brushes to paint on different parts of model and change the mode to Soft light 100%. You can use Eraser Tool or add layer mask to remove any unwanted parts.
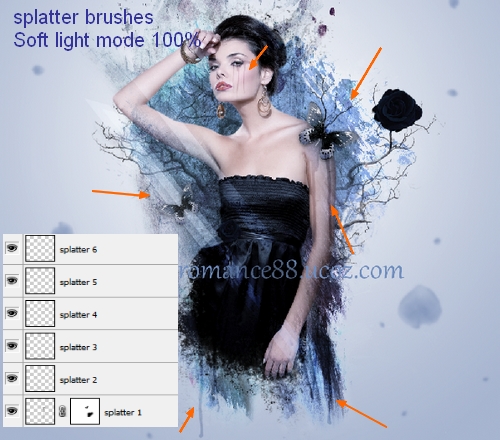
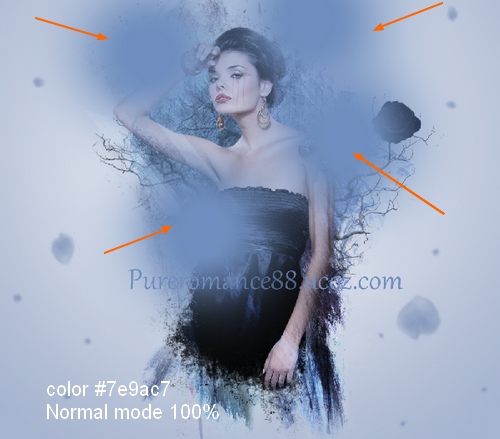
13. Make a new layer and use soft brush with color #7e9ac7. Paint on some parts of picture and change mode to Soft light 100%:
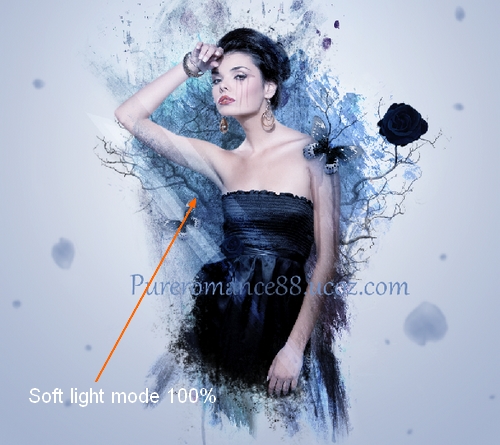
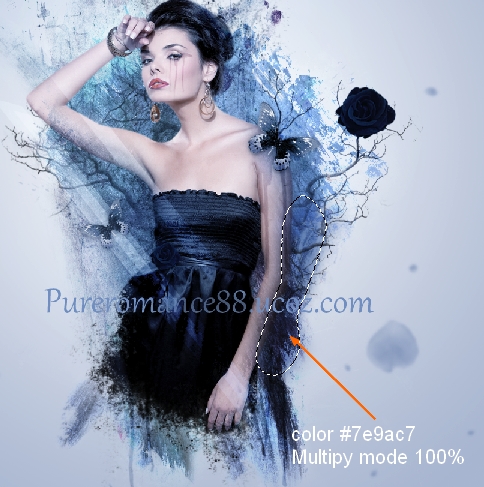
Make a new layer, use brush with same color. Paint on the right arm and change mode to Multipy 100%:
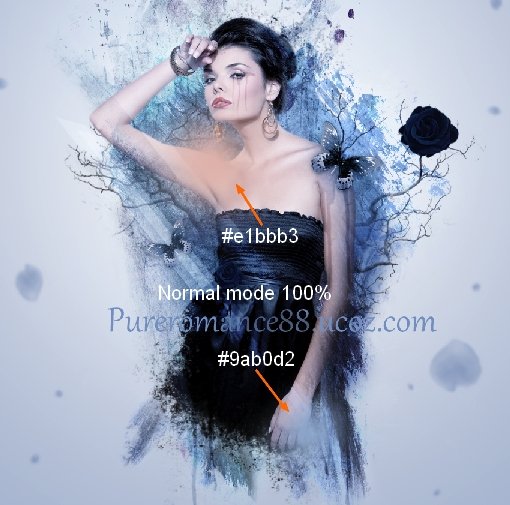
New layer and use brush with color #9ab0d2 and #e1bbb3. Paint on the left shoulder and the right hand. Change the mode to Hard Light 100%:

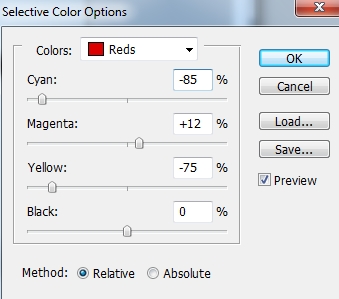
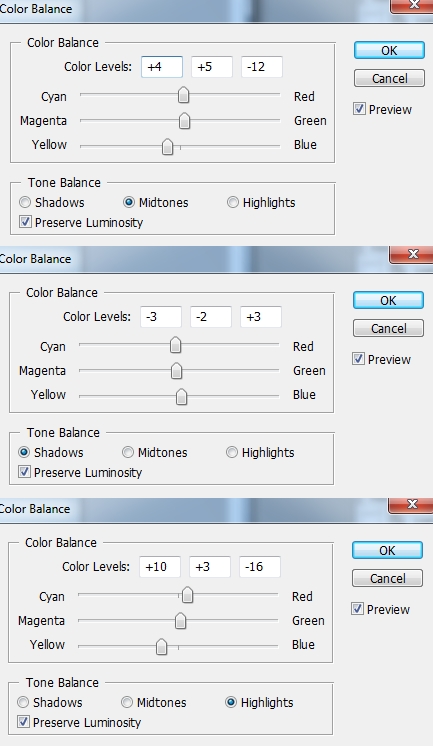
14. Create two new adjustment layers on the top :
Selective Color:
Color Balance:
You can merge all layer and sharpen it with Unsharp Mask if you want.
Final Result:


No comments:
Post a Comment